Below is a list of different topics to help the music teacher in maintaining and caring for their Violins, Violas, Cellos and Basses. We will be updating this page regularly with new topics and information. If there is something you would like to see here, let us know!
If you are looking for any of these items, call us at 312-786-0459 or email us [email protected]. We either have these items available or can direct you to a supplier.
Chinrest Keys – invaluable to adjust your student chinrests.
String Protectors – Extend the life of your top strings and the bridge.
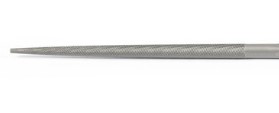
Small File – to fix nut buzz along with an HP Pencil (or Softer).
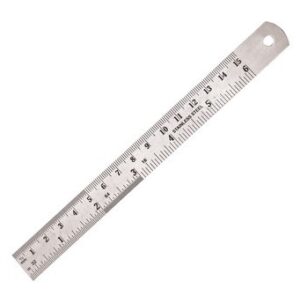
Metal Ruler – 6 inch/15cm (it is important to have both measurement systems), measuring string height, fingerboard height projected at bridge
Tape Measure – 3 feet/1 meter for measuring the important parts of the violin
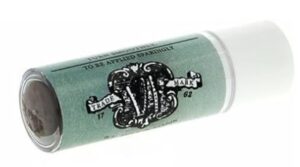
Peg Compound – Drops tighten the grip, Dope loosens the grip, Paraffin Wax, Lava Soap

Rosin and Cloth – A microfiber cloth or a cotton cloth
Isopropyl Alcohol – For string cleaning (keep away from varnish)
Fine Steel Wool – (Type 0000) cleaning metal parts, including strings
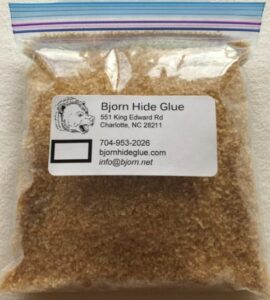
Bjorn Hide Glue – Instructions for use. Weak Mixture
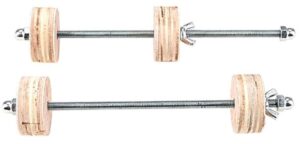
Spindle Clamps – You may also make these yourself with similar pieces of wood, large screws and cork.
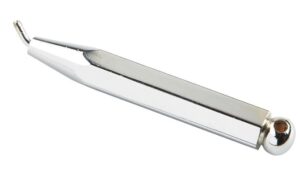
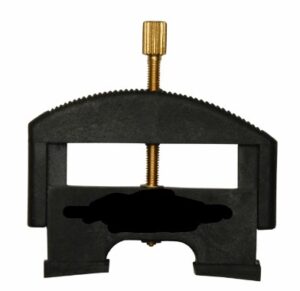
Violin Bridge Jack & Cello Bridge Jack – string lifter to make changing a bridge easier
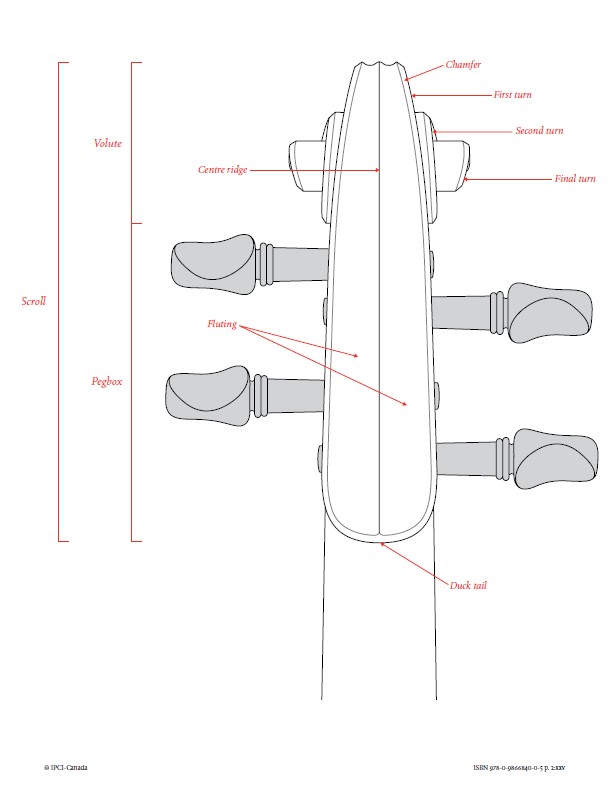
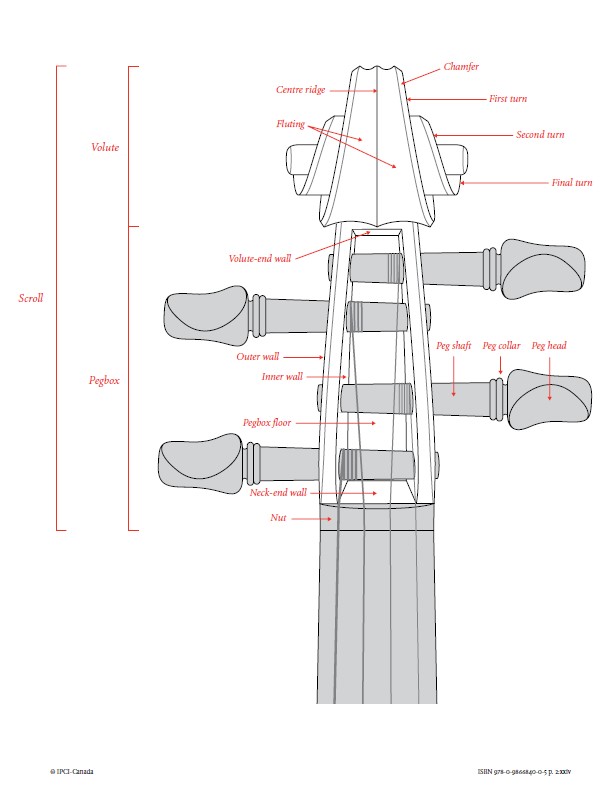
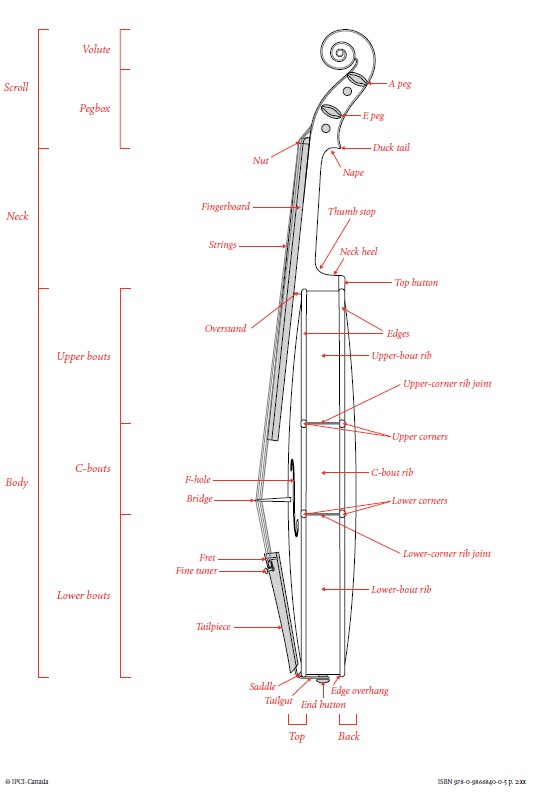
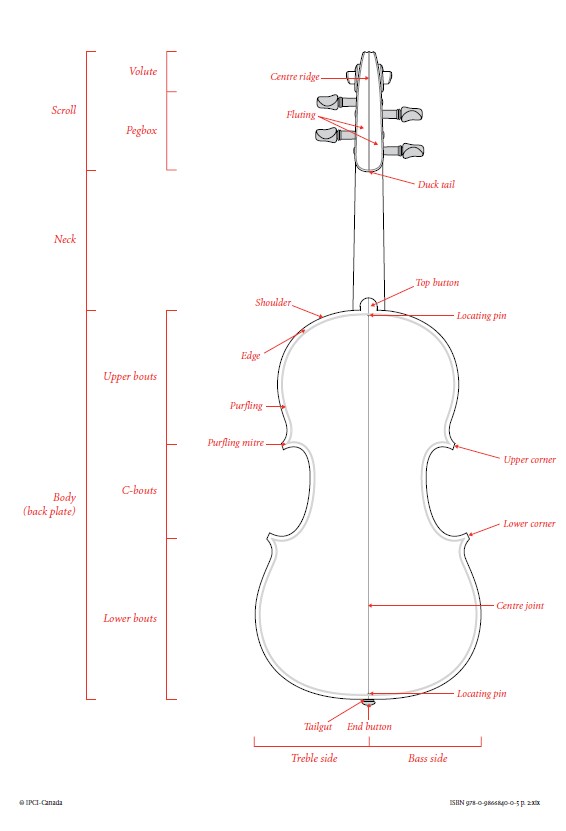
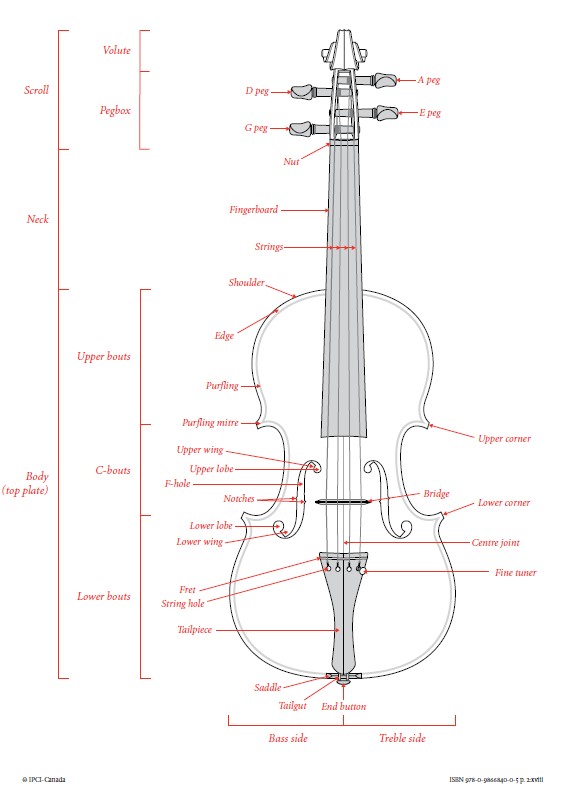
These charts describe in detail all the parts of the instruments.
This document is excerpted from The Conservation, Restoration, and Repair of Stringed Instruments and Their Bows, ed. Tom Wilder and used with his permission.
You can get good information about your instruments with measurements. Below are some examples of how to get certain measurements and our standards for different sizes. Information is in millimeters.
Body Length is measured along the back plate from next to the neck to the middle of the lower block. 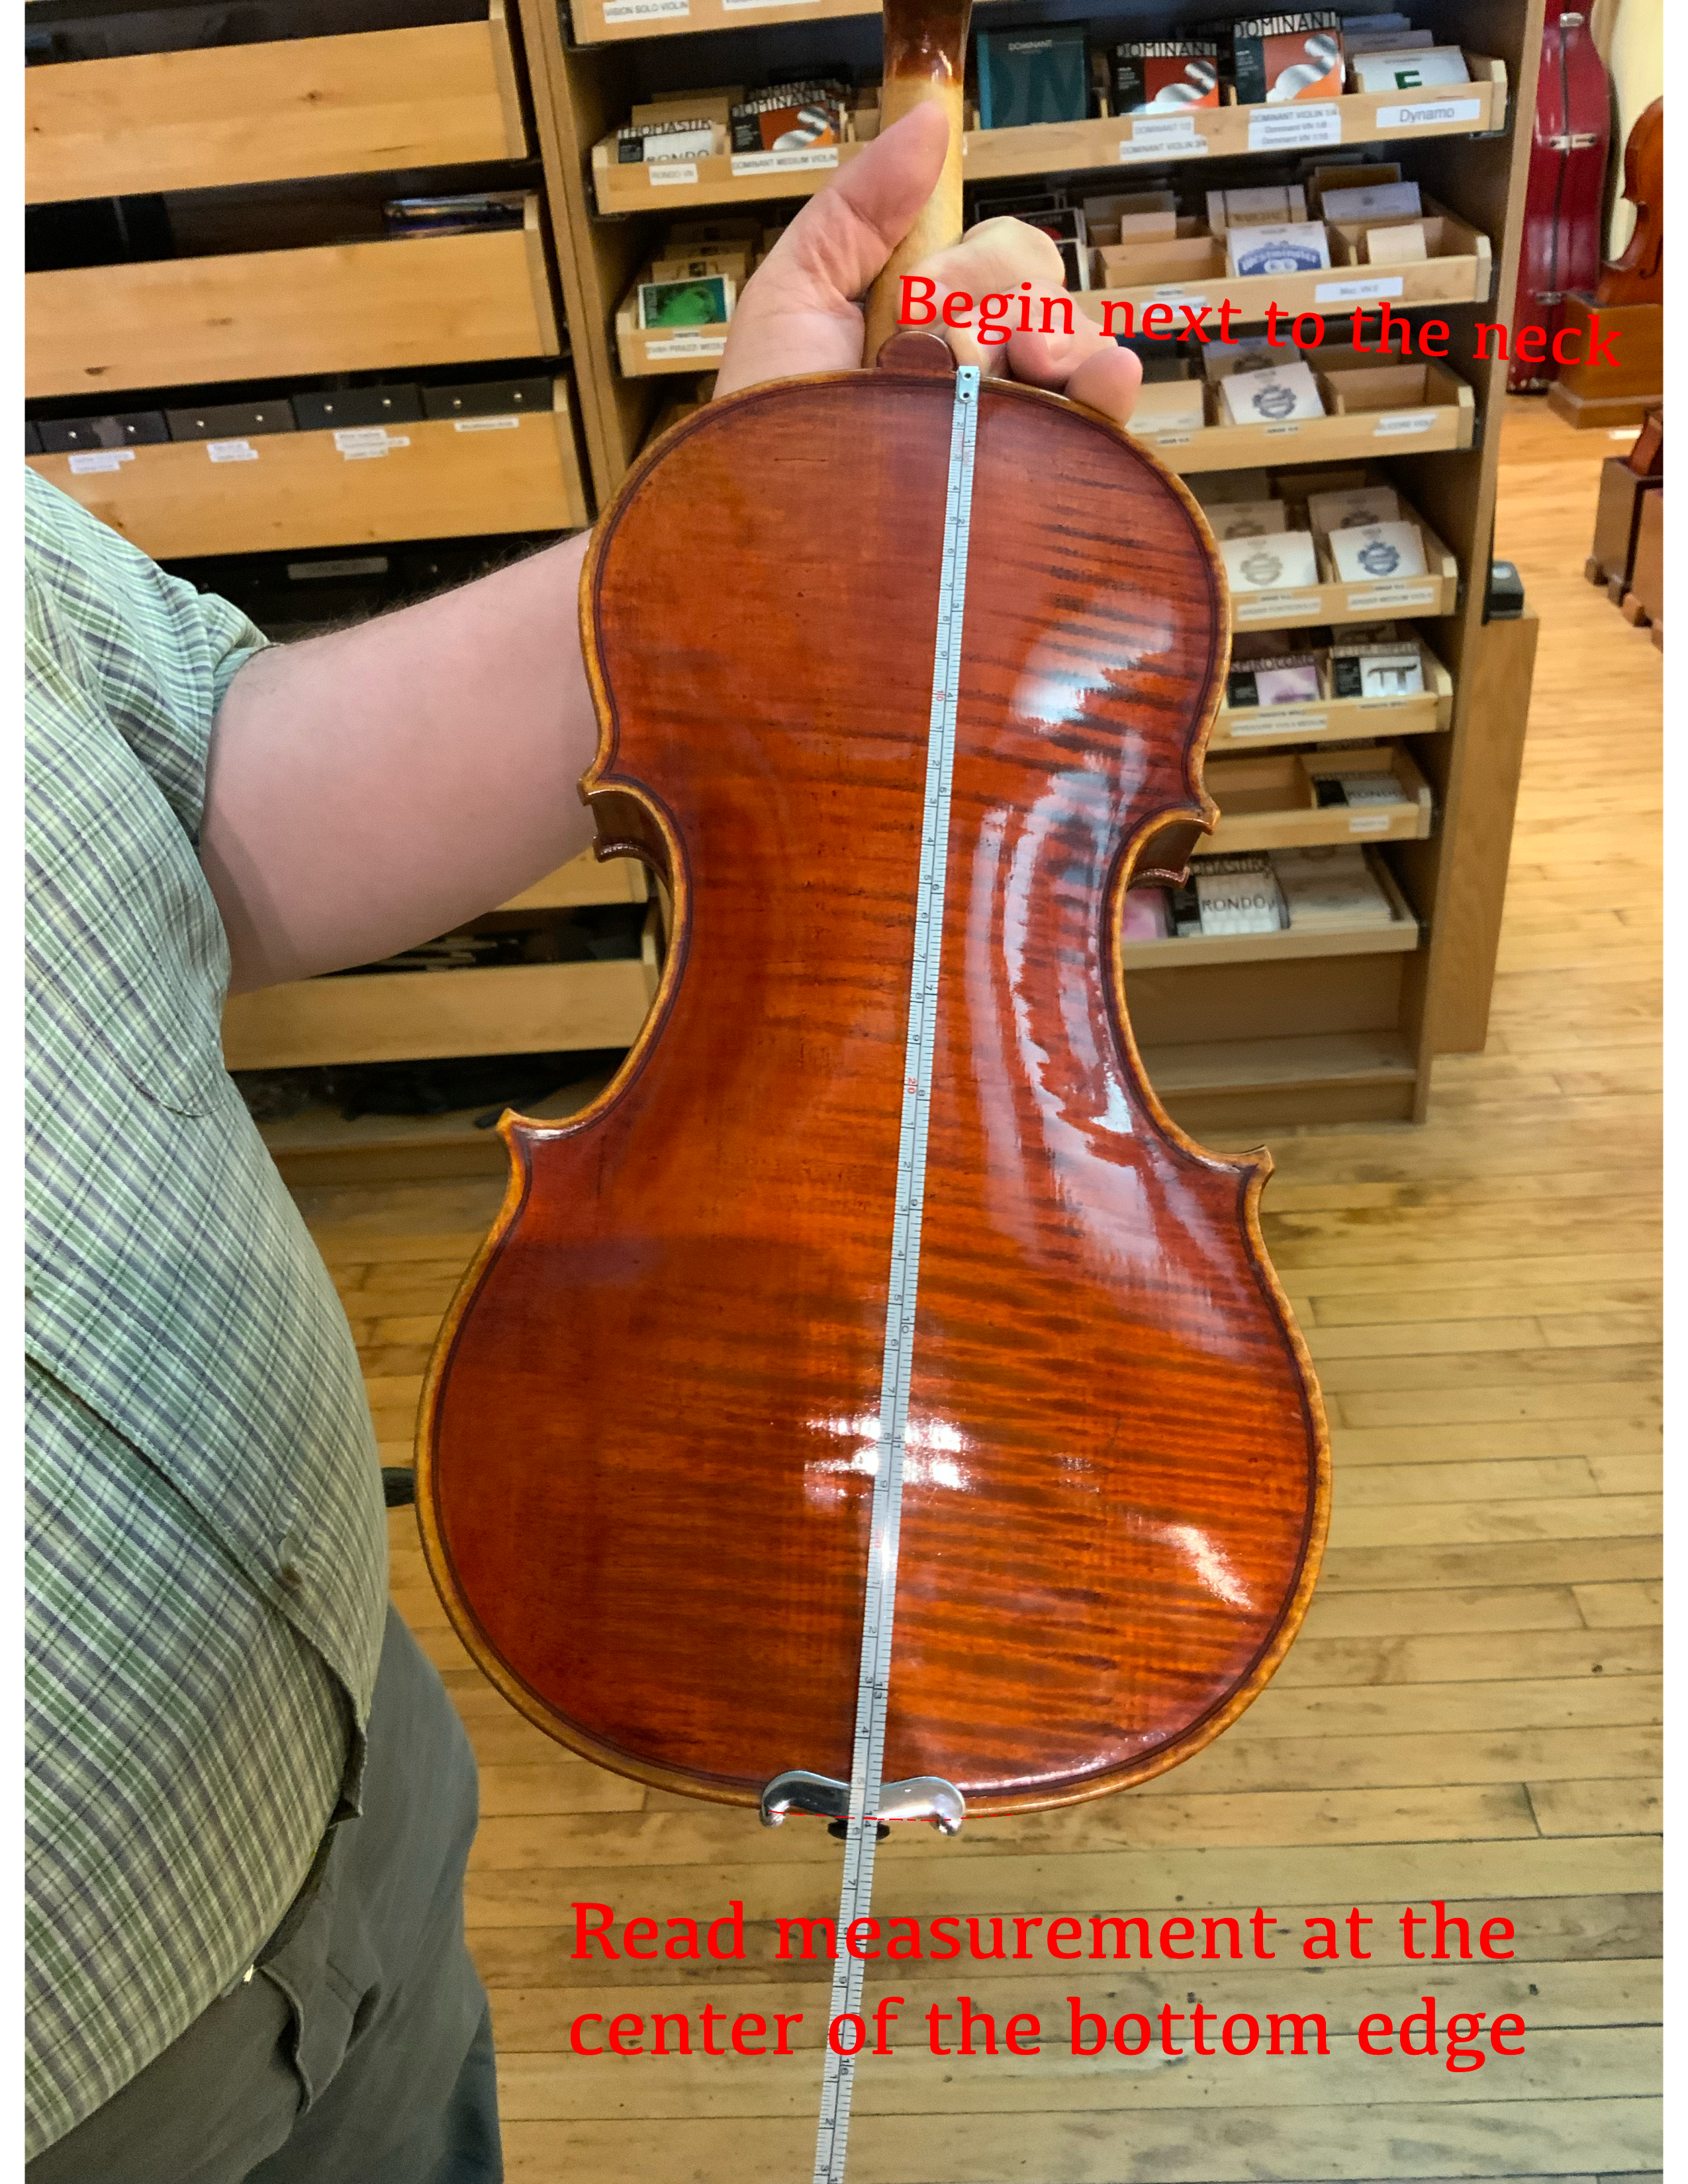
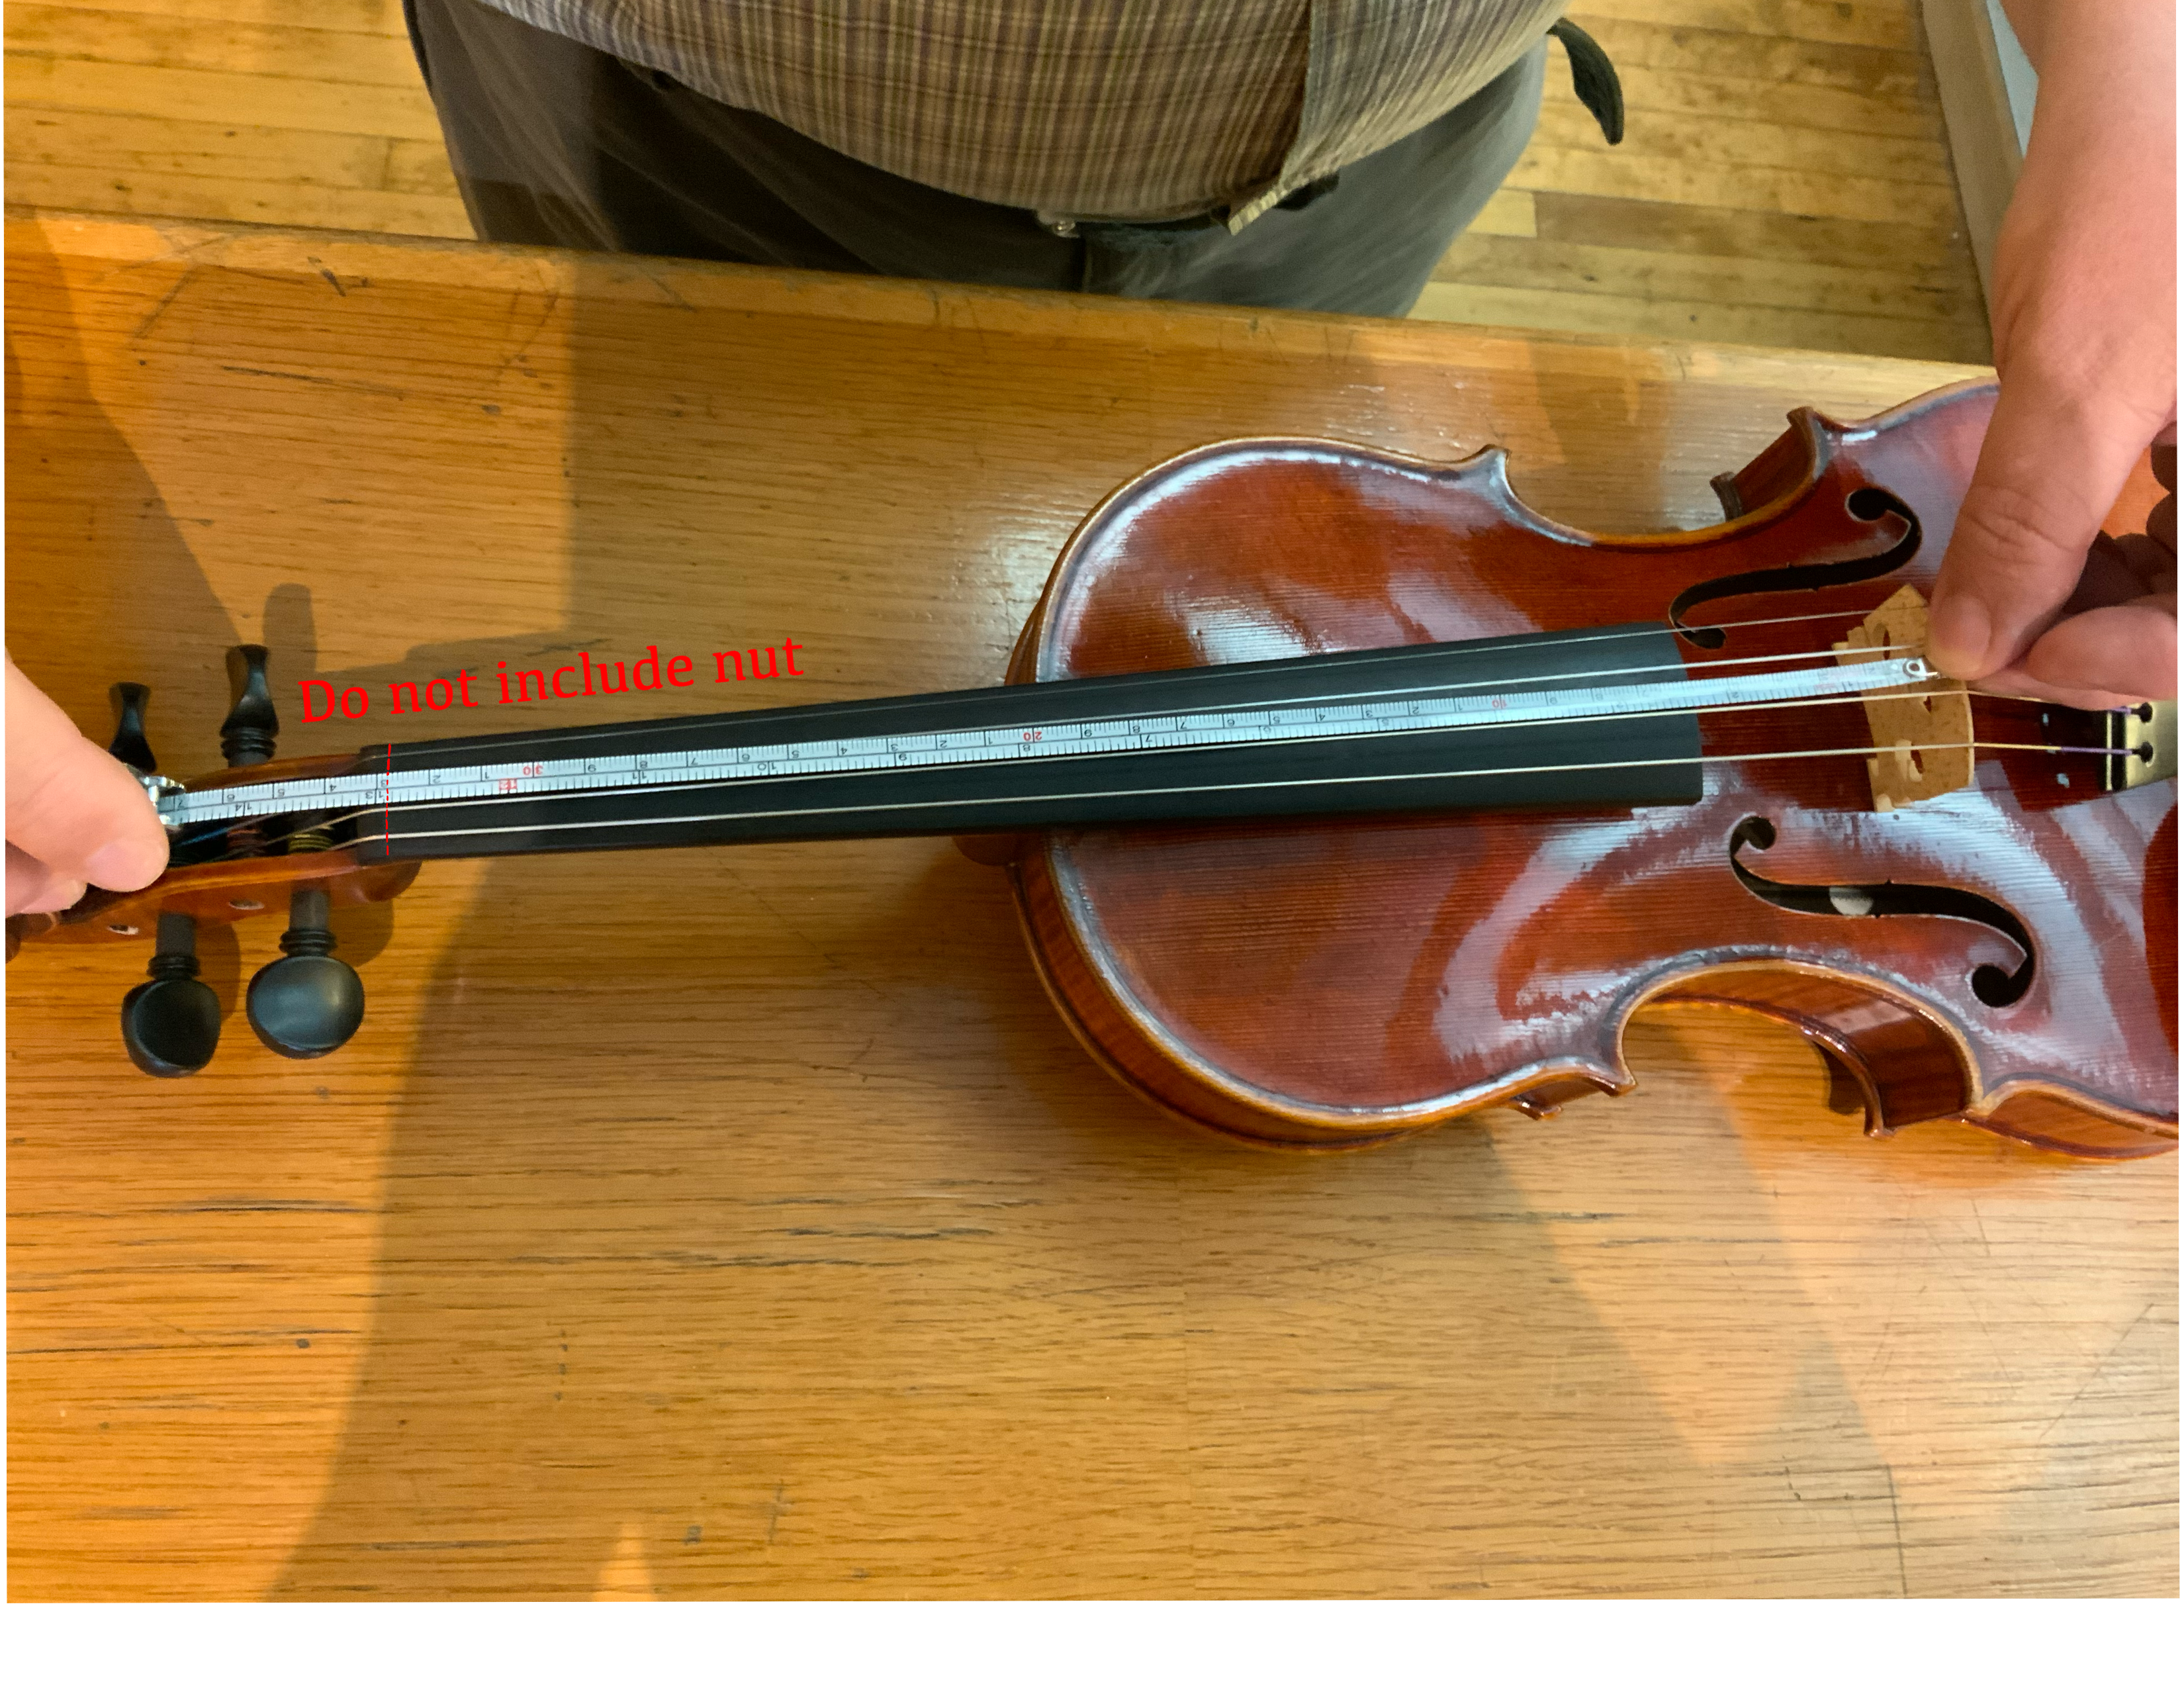
String length is from the edge of the nut (not including the nut) to the edge of the bridge.
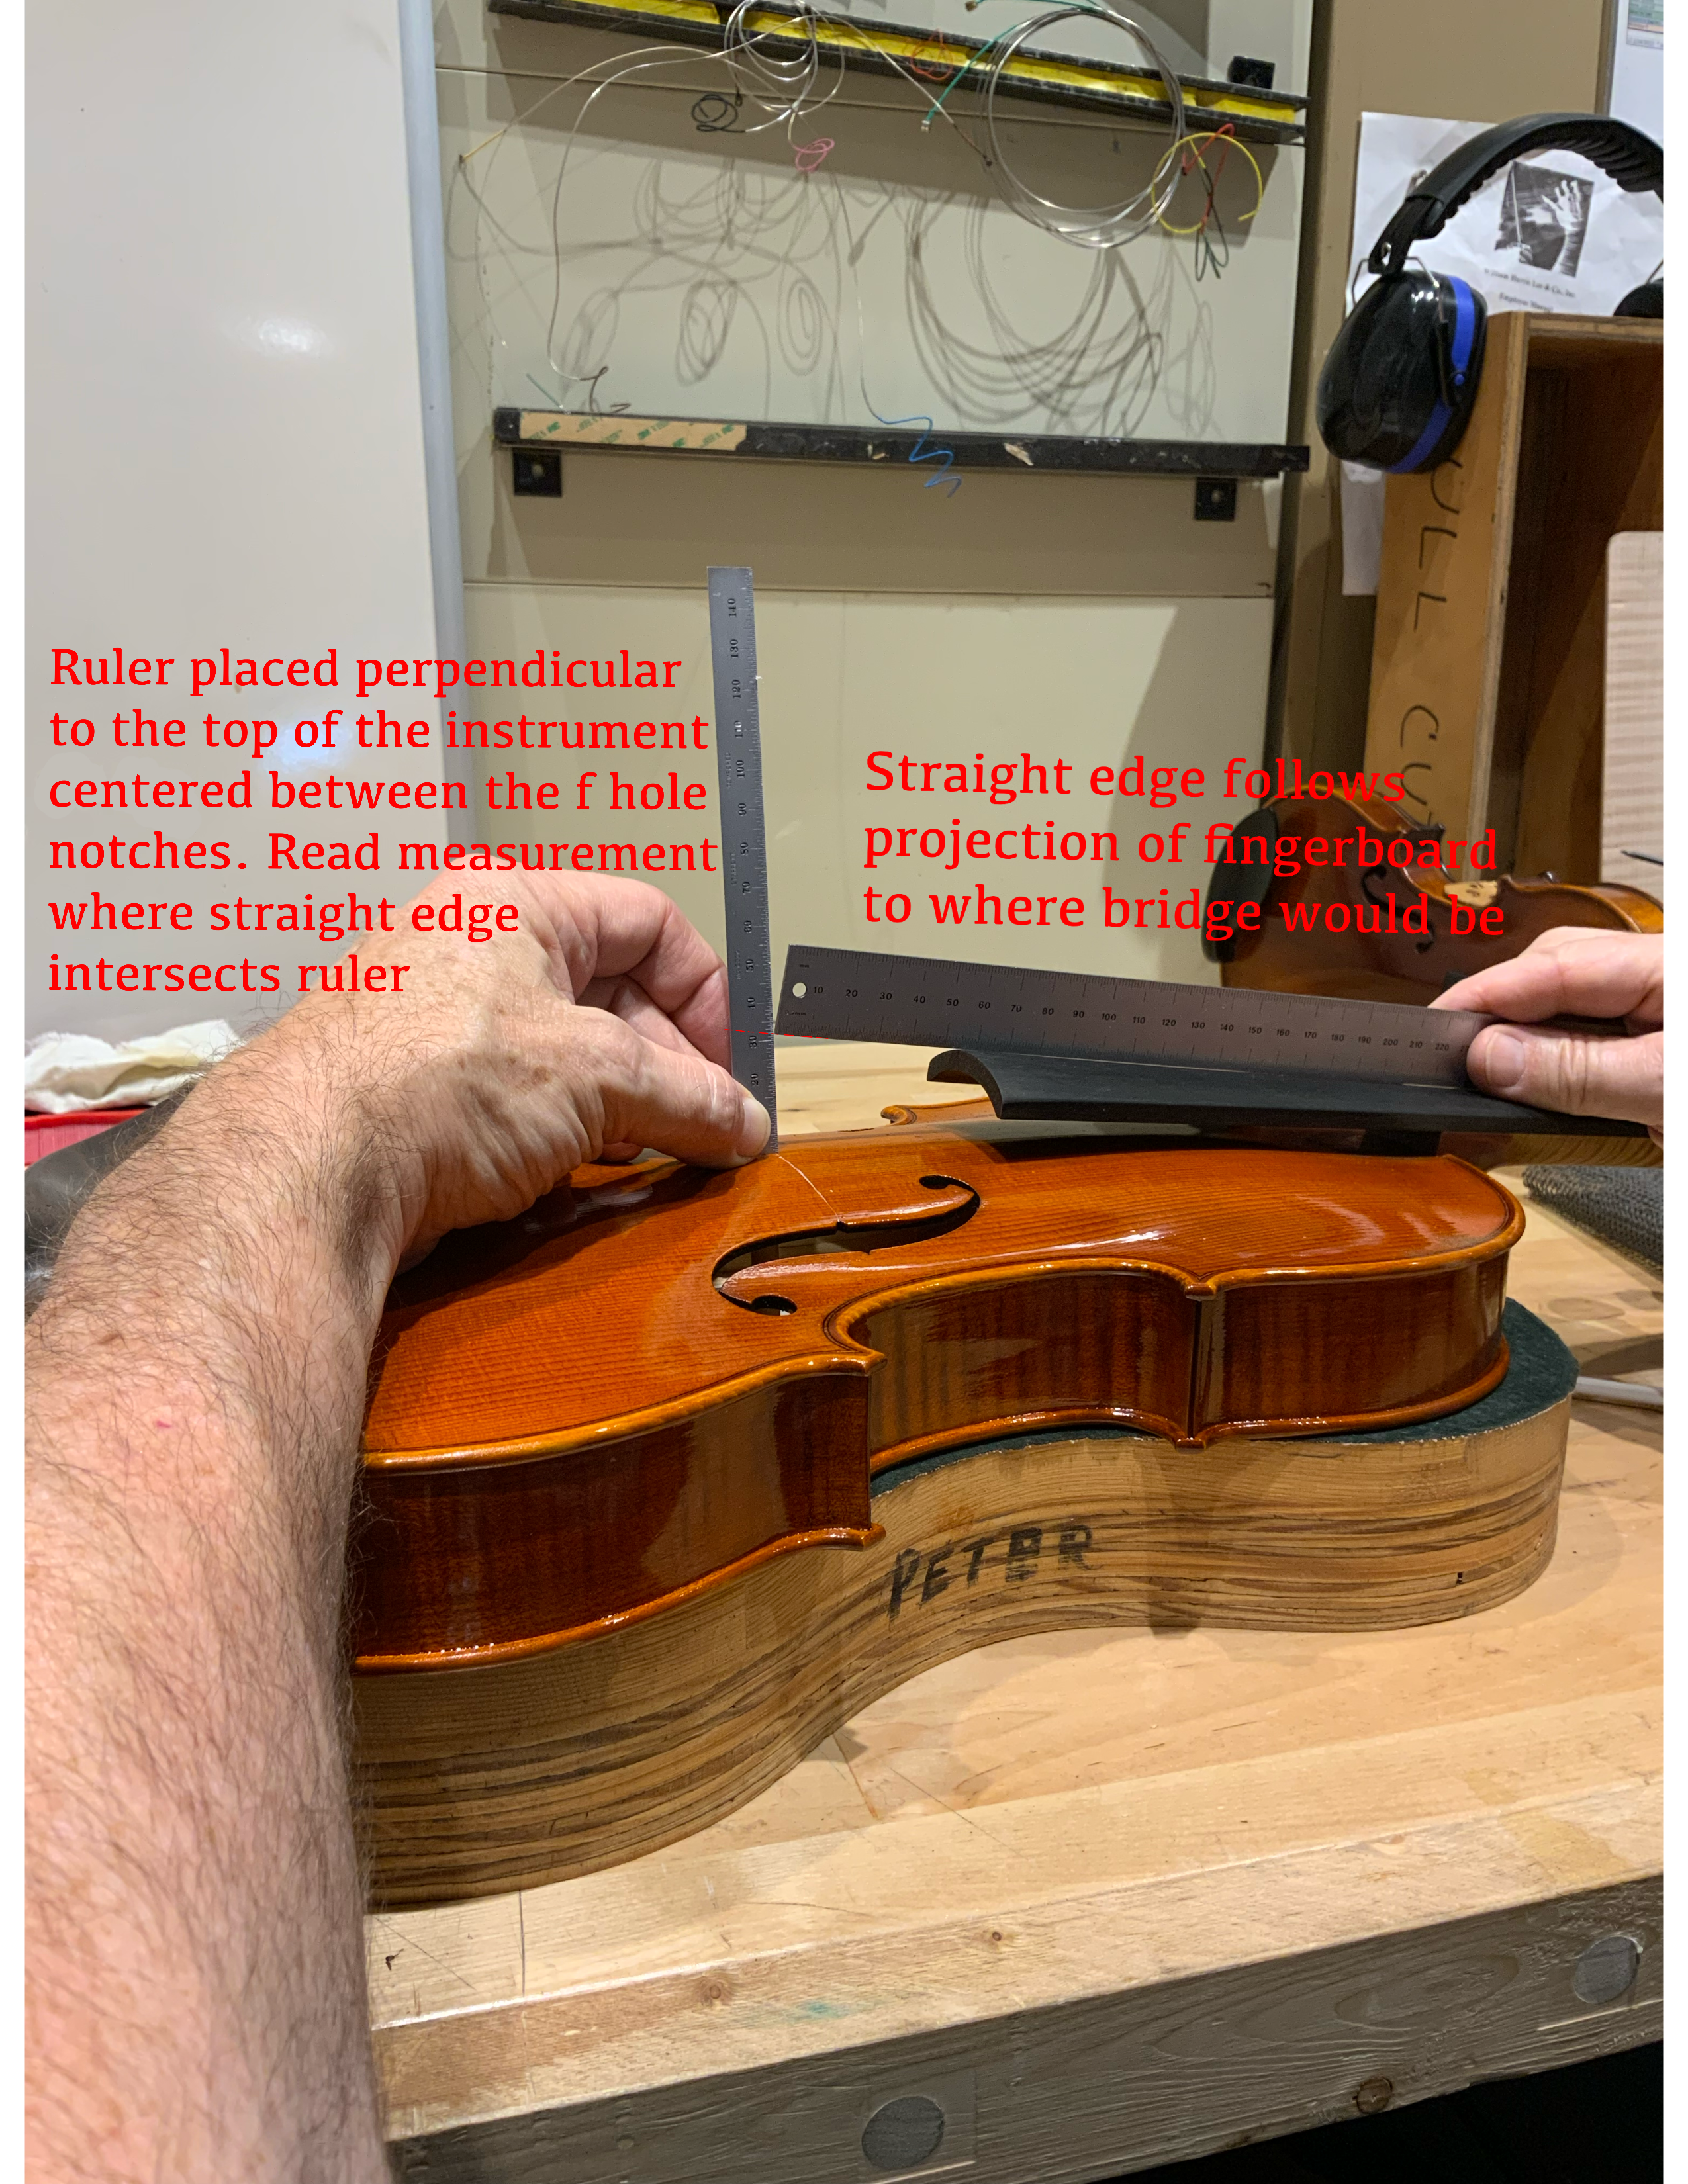
Fingerboard Height Projected at Bridge.
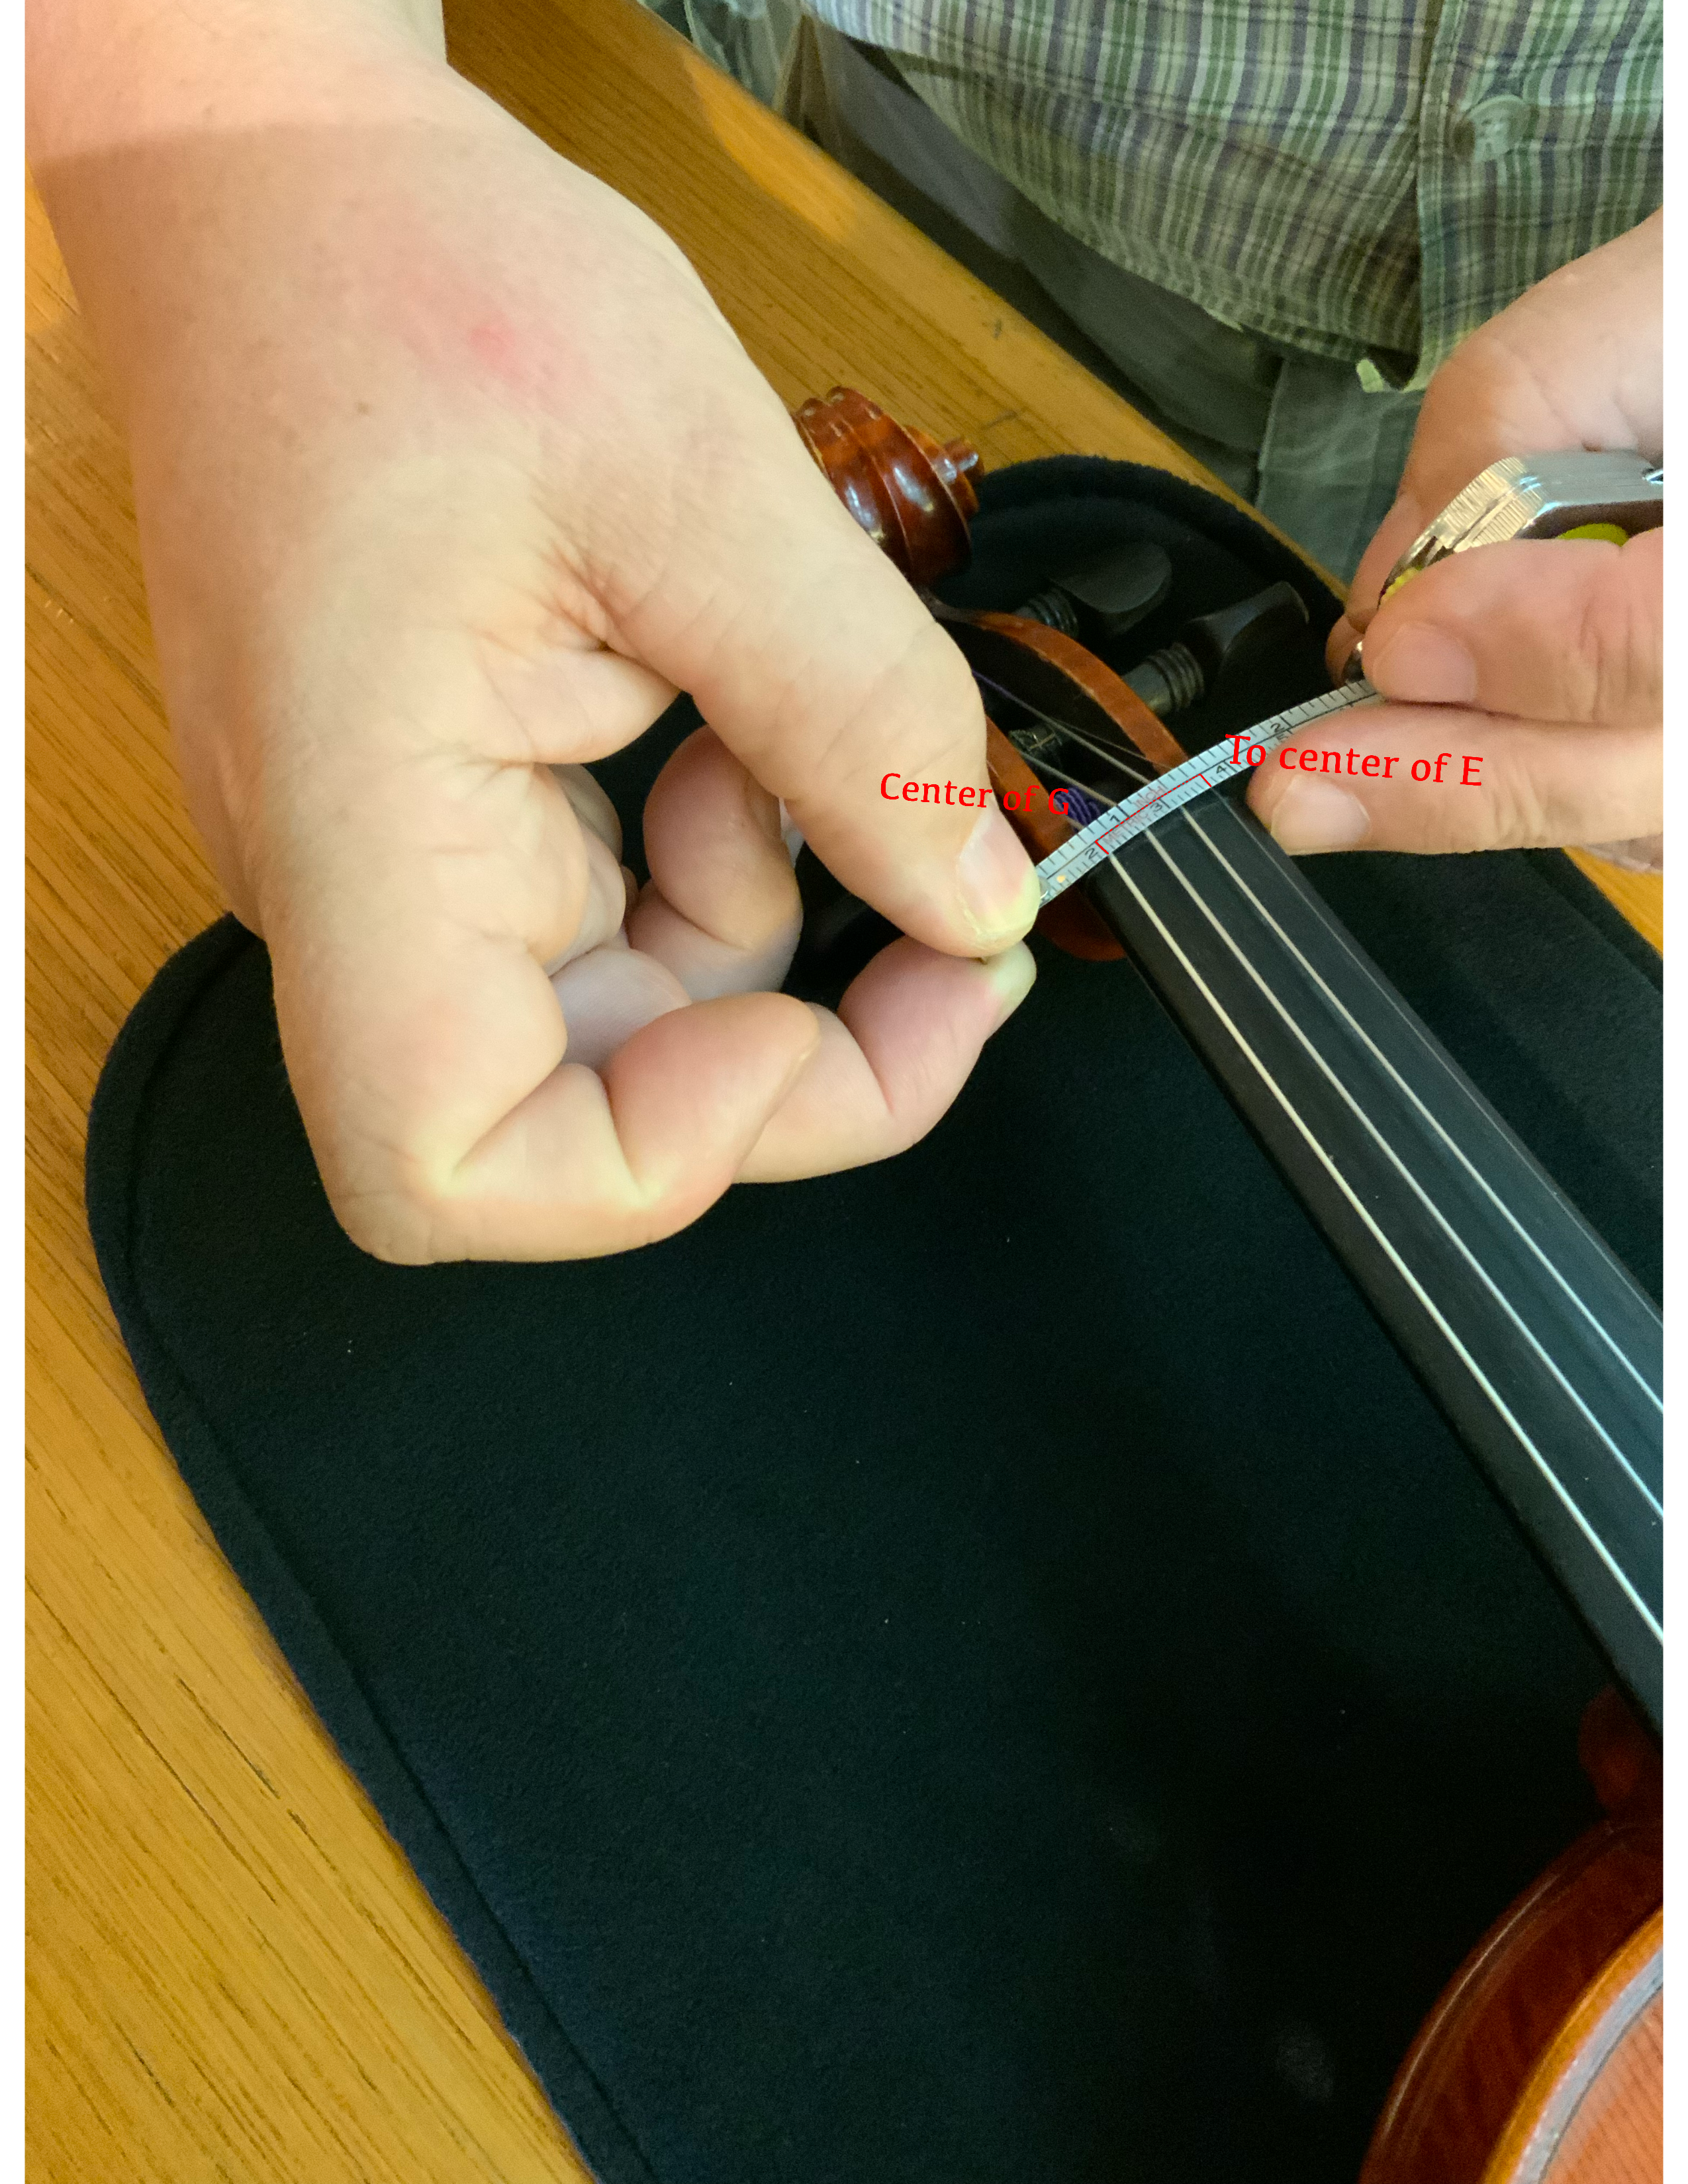
String Spacing at nut
| VIOLIN/VIOLA | |||
| Neck to Mid-Palm | Age | Violin | Viola |
| 13.5″ | 3-4 | 1/32 | |
| 14-15.5″ | 4-6 | 1/16 | |
| 15.5-16.5″ | 5-6 | 1/10 | |
| 16.5-18″ | 6-8 | 1/8 | 10″ |
| 18-19″ | 8-9 | 1/4 | 11″ |
| 20-22″ | 10-11 | 1/2 | 12″ |
| 22″ minimum | 11-12 | 3/4 | 13″ |
| 23.5″ minimum | 12+ | 4/4 | 14″ |
| CELLO | |||
| Student Height | Arm Length | Age | Cello |
| 3-4 | 1/16 | ||
| 3′ | 15-16″ | 4-5 | 1/10 |
| 3’3″ | 16-18″ | 5-7 | 1/8 |
| 3’6″-4′ | 18-20″ | 7-9 | 1/4 |
| 4′-4’6″ | 20-22″ | 10-11 | 1/2 |
| 4’6″-5′ | 22-24″ | 11-12 | 3/4 |
| 5’+ | 24″+ | 12+ | 4/4 |
| BASS | |||
| Student Height | Age | Bass | |
| 1/16 | |||
| under 3’6″ | 4-7 | 1/10 | |
| 3’6″-41 | 7-9 | 1/8 | |
| 4′-5′ | 9-12 | 1/4 | |
| 4’10”-5’4″ | 11-14 | 1/2 | |
| 5’3″ minimum | 15+ | 3/4 |
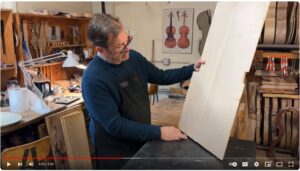
Spruce is the soft acoustic wood used in instrument making. 90% of the sound comes from the spruce. Spruce is the lightest wood for the amount of strength it has, making it the perfect wood for acoustic instruments.
Violin wood used for the tops of the instruments is almost always quarter-cut. A pie cut is taken from a log, divided in half, and then joined together. This gives you the flat bottom and beginning of the arching for the top. The grain is perpendicular to the plate.
Once the top is formed, purfling is inlaid around the edges of the top. This is not just decorative, it also protects the top from cracks – in the event of a strong impact to the edge it will keep a crack from spreading past where the purfling has been inlaid.
Maple is what we most often use for the backs of instruments. Instead of quarter-cut, this is a slab-cut. The tree trunk is cut length wise, leaving the grain in the opposite direction of the quarter-cut top. Having the grain this direction is ok for the back, as the maple is a much stronger and heavier wood than the spruce used for the top.
The two main woods used in instrument making are spruce and maple. Although slab-cut maple was shown here, we do often use quarter-cut maple as well, but are always happy to be able to use a slab-cut piece!
The effects that changes in weather and humidity have on instruments are particularly import for string instruments. Most string instruments have a top made of spruce and back, sides, and neck made of maple.
When wood is affected by humidity, it will expand – the more humidity the wider it will get. On the other extreme, such as the winter in Chicago when it is well below 0º F, the relative humidity outside could be relatively high, but when you bring that cold air inside and warm it to room temperature the relative humidity drops dramatically. Inside it could be below 10% humidity which is extremely low for a string instrument.
The more humidity there is, the wider the instrument gets. The wood expands perpendicular to the grain. The light part of the grain is the soft part of the wood and absorbs the most moisture. The darks lines are the winter grain and are hard, which means they aren’t affected the same way. The same principle applies the both the spruce and the maple.
Here’s the problem – the string instruments are by design fighting themselves. (Eg. the ribs are changing in a different direction than the blocks, which is why cracks often happen by the end block.)
Probably the single biggest cause of cracks in string instruments usually happens in the winter when we bring cold air inside and warm it up without humidifying it.
The next important part of this picture is that the top expands substantially, but is constrained by the ribs, so that the arching goes up on the top and down on the back, causing the soundpost to become loose. (The soundpost shrinks width-wise but not length wise.)
Having a tight soundpost in the summer when it is humid when you are in a climate when it then gets cold and dry in the winter is causes a very dangerous situation that often results in a soundpost crack on the top or bottom of your instrument as the soundpost becomes so tight.
An historic part of this issue is that we use a particular kind of glue to hold string instruments together – hide glue. Hide glue is made of animal cartilage which is basically an unflavored, unsweetened jello. This is the perfect material for gluing because of its brittleness. The brittleness is essential as the glue joint will pop as it expands or contracts as opposed to cracking the wood. If the glue used is stronger than the wood it will cause the wood to crack instead of just popping the joint. Thus, it is essential to use hide glue.

The wood in the string instruments is greatly effected by the amount of moisture in the air. When the weather is hot and humid, the wood wants to expand. In the winter when it is commonly much dryer, the wood contracts. to minimize these variations, we can control the general humidity around our instruments.
Having a climate control system where your instruments are stored is a great goal. If you can keep your relative humidity to around 40-50%, this would be optimal.
However, it is not always possible to keep a humidifier running constantly, or have a dehumidifier going in the summer. There are a number of individual instrument possibilities. “Dampits” had been the common choice for a long time. However, these can be subject to user error – introducing too much water to the unprotected inside of your instruments.
Lately we have been recommending the Humidity Control packets (Boveda and Humi-Smart are two brands) to our customers and teachers. These are “Two-Way” packets, putting out moisture in the dry times and absorbing excess moisture in the wet periods, with defined percentages the pack is trying to maintain. In a protective sleeve, these go inside the instrument case and stabilize the humidity when the case is closed. The packets have a suggested life about 4-6 months and go brittle when they need to be replaced.
String instruments work better when they are cleaned up. The extra rosin dust, the buildup of dirt and hand oil, and the accumulation of other environmental hazards can make our stringed instruments function badly.
As teachers, we’ve all seen a lot of grungy instruments. The best way to keep your instrument from becoming grungy is to be diligent and clean it after every use. To help your students remember to clean their instruments after every use, and to reinforce that habit, remind your students at the end of every rehearsal to loosen their bows and wipe down their instruments with a cloth.
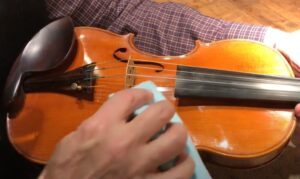
The rosin dust, dirt, and sweat will come off easily if removed after every use. If left on the instrument, these substances will bind with the resin varnish. Once this has happened, you will most likely need a professional to remove the gunk using a solvent.
To clean your instrument after every use, use a soft cotton or micro-fiber cloth which can be washed as needed and reused. With this cloth, gently dust underneath the bridge, under the fingerboard & strings, and the strings themselves. Be very cautious when dusting near the f-holes not to apply any pressure to the body of the instrument.
If the dust and sweat are allowed to remain on the strings, they will gunk up the winding and make the strings go false faster.
To clean the ebony parts of the instrument, especially the chinrest, we use Method cleaner which is non-abrasive and has no solvents. Make sure not to get any liquid on the varnish of your instrument when wiping off the ebony.
To ensure all is well with your instrument, make sure you see your luthier on a regular basis for check-ups!

The lifespan of a string is about 250-300 playing hours (although lower strings may potentially last longer), and we recommend changing your string(s) after that many playing hours.
What this means is that if you play four hours a day, seven days a week, you’ll want to change your strings about every 2 1/2 – 3 months.
When a string is first put on, it has a crispness, clarity, and power that degrades over time, with a abrupt increase in degradation speed around 250 playing hours.
Often, one might feel that their instrument is our of adjustment, when really it is just that the strings are old and need to be replaced.
HOW TO CHANGE A STRING
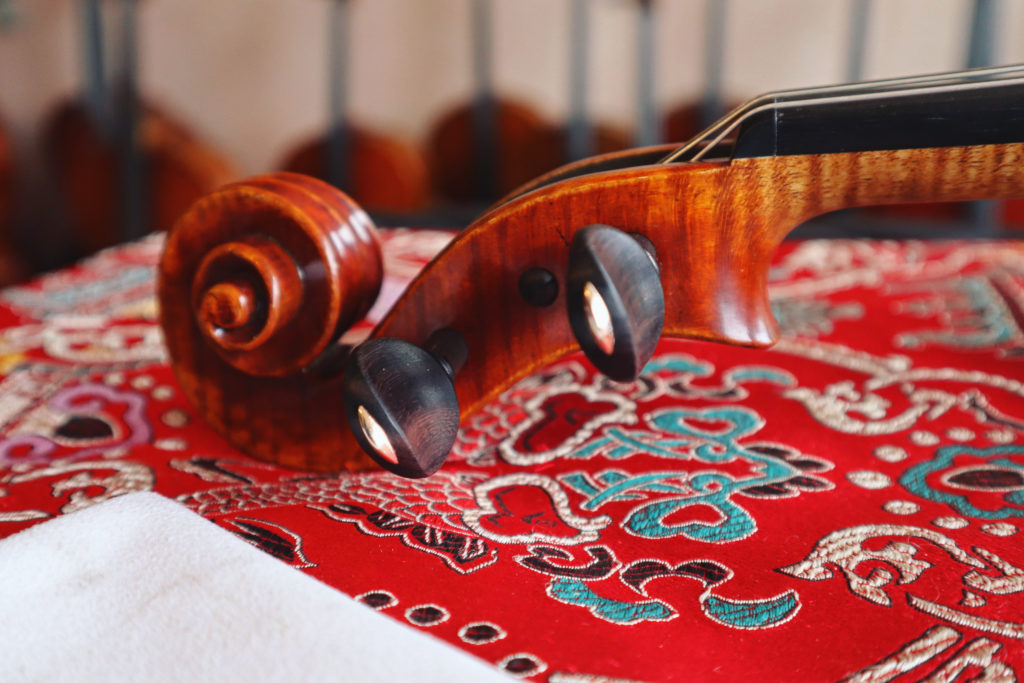
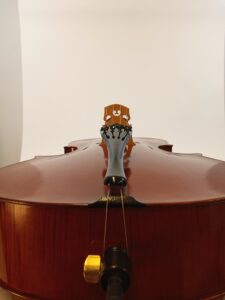
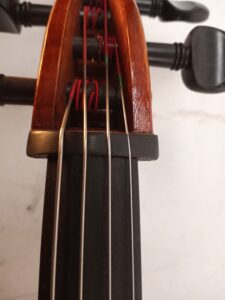
First of all, there are a few things you don’t want to see when you look at the peg box of the instrument. You don’t want to see any loose string ends – they have the potential to vibrate and create a buzz. You also wouldn’t want to see the string touching the side of the peg box – this could damage the string, making it go false, and/or break the string.
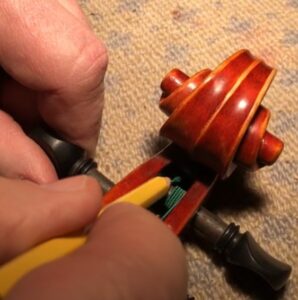
Now onto changing a string! Remember, change just one string at a time.
This will keep the bridge and the soundpost from moving and allow time for graphite (pencil lead) to be put in the notches of the nut and the bridge for lubrication. The graphite will assist the string and string winding go smoothly over the nut and bridge.

Remove the string you’d like to change. Use a pencil to put graphite into the notches in the nut and bridge where the removed string previously was.
Put the ball end of the string in the tailpiece, ensuring it is hooked at the narrow end of the keyhole. Bring the string over the notch in the bridge, and then slip the end of the string through the hole in its peg, leaving about 5mm (1/4 inch) visible on the other side of the peg hole. 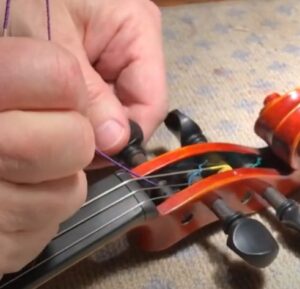
Wind the string on the peg, always winding it over the top of the peg. After turning the peg a couple times, catch the end of the string under the part of the string being wrapped around the peg, and secure it as you wind the string so that the string will remain secure.
As you finish winding the string to bring it to correct pitch, make sure it is close to, but doesn’t touch, the side of the peg box.
You’ve changed a string! Now onto the next one….
Check out this video that Bill Lee made with Mimi Zweig.
“The Short Story of String Life Span and How to Change a String”

How to take care of your tuning pegs!
Watch this video from Bill Lee “The Story of Creaking and Slipping Pegs (that haunt us when trying to tune our violins)”
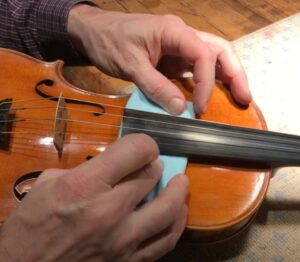
Here we have a classic case of a creaking and sticking peg on an older instrument. You are able to hear the “sticking” sound as you try and move the peg. What a sticking peg requires is a lubricant. What we recommend for a lubricant is the Hill Peg Compound. Using this will make your peg turn more smoothly.
To use the peg compound, remove the sticking peg, and then put the Hill Peg Compound around the peg where it meets the peg box. This should, hopefully, get rid of the sound and allow the peg to turn more smoothly. Test the peg in the peg box before restringing, and when the peg turns as it should, restring the instrument.
Slipping Peg – when you tune, but the pitch of the string keeps slipping because the peg is too lose, you have a slipping peg. To fix this, we use Lava soap. Lava soap is a soap you can buy at pretty much any pharmacy (such as Walgreens and CVS), or at a place like Home Depot. It is a soap with a little bit of very fine pumice contained within it.
Once you’ve removed the slipping peg, put some of the Lava soap around the peg where it touches the peg box. Doing this will give the peg a little bit of “bite” and hold the peg more tightly in the peg box, hopefully eliminating the slipping problem.
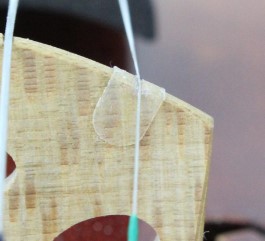
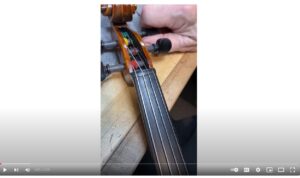
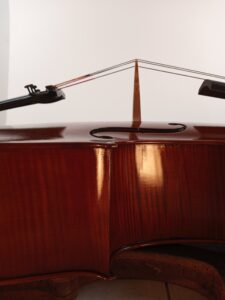
What happens when there is a strange buzz from your violins? Please watch this video to see one of the best ways to easily get rid of unwanted buzzing.
As you’ll see, eliminating a buzz is a process of trial & error to get the string to the exact spot you want.
With a new instrument, you might hear a buzz from one or more of the strings. In this case it seems to be coming from the D string. When we loosen the string a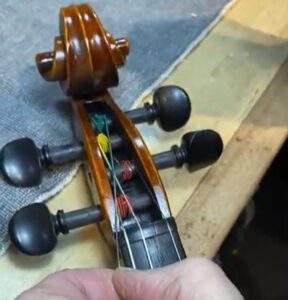 little – not enough to remove it, just enough to move it to the side of its groove on the nut – we can see the groove from the peg box to the fingerboard.
This groove is shiny where the string touches, except for one small spot by the fingerboard where we can see the string isn’t touching but should be. This spot is likely what is causing the buzz.
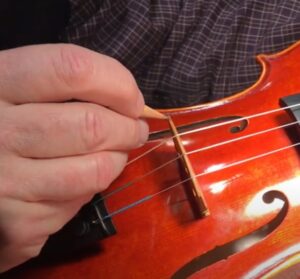
To solve this, and hopefully eliminate the buzz, use a very fine file from the front (fingerboard) side of the spot and carefully file it a tiny bit down. Ensure you don’t file the part of the groove where the string  is already touching with the file. Once you have filed it a bit, use a pencil to put some more graphite on the just filed spot.
Re-tune the string and check if the buzz is gone. If it is not gone, repeat the filing procedure then test again. Just make sure to file just a little at a time, as to not make the groove too deep.
Once the buzz is eliminated on this string, repeat the process as needed for other strings.
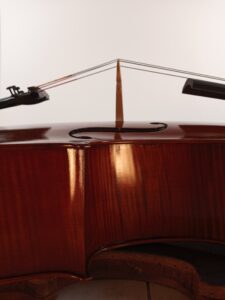
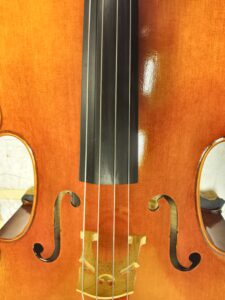
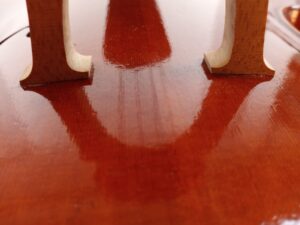
Align the bridge equidistant between the inside edge of the two f-holes at the stop.
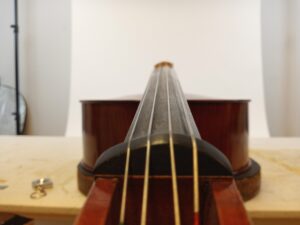
Center the bridge horizontally between the the f-hole notches
Center the tailpiece hanger on the saddle.
Check the soundpost placement.
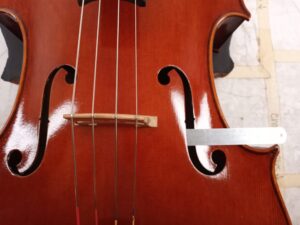
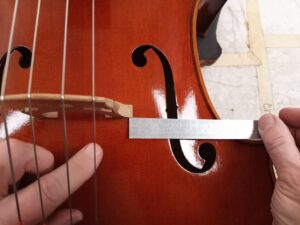
Check the alignment of the strings on the fingerboard.
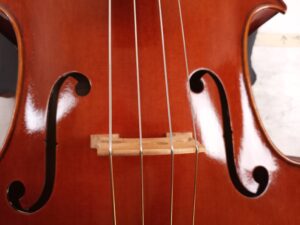
Tune instrument and make sure the feet are flush to the top and back of bridge is visually perpendicular to the plane of the ribs.
Things to specify when shopping for new school instruments
String types – The quality of strings will greatly change the sound of your ensemble. Strings range from cheap to expensive, as well as from having a very short life to a long life. Good quality strings for student ensembles are a combination of price and life-span, being both durable and providing a good sound quality. These strings can include:
Violins – Dominant A, D and G with a Lenzner E
Violas – Dominant C, G and D with a Jargar A
Cellos – Spirocore Chrome C and G with Jargar D and A
Bass – Heliocore
Peg Types – Mechanical pegs provide stability with tuning. It does make changing strings a little more time consuming, but won’t need to be changed as often. Wittner, Knilling and PegHeds are different brands of mechanical pegs.
Carved versus laminated – Laminated, or Plywood, instruments are very resilient to changes in weather and damage, but at the cost of sound quality.
Bow types – As with instruments, inexpensive Bow Shaped Objects exist. Fiberglass (as opposed to Carbon-Fiber) bows with synthetic hair while good looking for the pocketbook will lead to unpleasant sounds. The technology used to make the carbon-fiber bows has increased tremendously and allow these bows to draw a more pleasing sound. The plus for carbon-fiber sticks comes from the durability. Brazilwood is a lower cost wood used for student level bows. While they do have a warmer sound over similar priced Carbon-Fiber sticks, they are not anywhere as durable. Brazilwood also does not have the strength of more expensive woods and will warp more easily.
What level of player are you needing these for – beginners, intermediate and advanced – While your players should all have well crafted instruments, the more expensive students instruments use higher quality materials, especially the wood they are constructed out of. These higher quality materials allow the instruments a wider range of expression and sound.
Sizes for your student ages – Using the chart provided in the above section on sizing, figure out which instruments you will need.